Originally posted 2024-02-01 05:15:40.
Fondant, the versatile and elegant sugar dough commonly used in cake decorating, has captivated the hearts of bakers and dessert enthusiasts alike. From its smooth and flawless finish to its limitless creative potential, fondant has become an essential tool in the world of confectionery. However, navigating the art of using fondant can be an intricate process for beginners. Therefore, this article aims to provide a comprehensive guide on how to use fondant, from preparing and rolling it smoothly onto cakes, to creating intricate designs that will leave everyone marveling at your sweet creations. Whether you’re a seasoned baker looking to refine your skills or a beginner eager to delve into the enchanting world of fondant, this informative article will equip you with the knowledge and techniques needed to master the art of working with fondant.
Introduction to Fondant
Fondant is a versatile and popular ingredient used in cake decorating. With its smooth and pliable texture, fondant allows you to create stunning designs and add a professional touch to your cakes. In this post, we will guide you through the process of using fondant, from preparing it to covering a cake flawlessly.
-
Preparing the Fondant:
Before you begin working with fondant, it’s essential to prepare it properly. Start by kneading the fondant to soften it and make it more pliable. Dust your work surface with powdered sugar or cornstarch to prevent sticking. Divide the fondant into smaller portions and store them in airtight containers, as the exposed fondant can dry out quickly. -
Covering a Cake with Fondant:
To cover a cake with fondant, first, ensure that your cake is level and thoroughly coated with buttercream or ganache. Dust your hands with powdered sugar or cornstarch, then roll out the fondant into a thin, even layer using a rolling pin. Carefully lift the fondant using a rolling pin or your hands, and drape it over the cake. Smooth the fondant onto the cake, starting from the top and working your way down to eliminate any air bubbles or wrinkles. -
Adding Designs and Embellishments:
Fondant provides endless possibilities for creating unique designs and decorations for your cakes. Add color to your fondant by kneading in gel food coloring, a little at a time, until achieving the desired shade. You can create intricate designs using fondant molds, cutters, or by shaping it with your hands. Embellish your cake with fondant flowers, bows, or even delicate lace patterns for a stunning final touch. -
Troubleshooting:
While working with fondant, you might encounter some common issues. If the fondant becomes too sticky, dust your hands and work surface with powdered sugar or cornstarch. On the other hand, if the fondant is too dry, apply a small amount of vegetable shortening to your hands and knead it into the fondant to soften it. Remember to work slowly and be patient, as fondant can be finicky but with practice, you’ll master it. -
Storing and Serving Fondant-covered Cakes:
To store fondant-covered cakes, keep them in a cool, dry place away from direct sunlight. Avoid refrigerating fondant-covered cakes, as condensation can cause the fondant to become sticky. When serving the cake, take care not to expose it to excessive heat or humidity, as this can result in the fondant becoming soft and losing its shape.
In conclusion, fondant is a fantastic medium that allows you to create visually stunning cakes. By following these steps and honing your skills, you’ll be able to confidently decorate cakes using fondant and impress your friends, family, and customers with your beautiful masterpieces. So go ahead, unleash your creativity, and have fun exploring the magical world of fondant!

Preparing and Rolling Fondant
Once you have your fondant ready, it’s time to prepare and roll it out for decorating your cakes or other confections. Follow these simple steps to ensure a smooth and successful fondant experience:
Step 1: Preparing the Surface
Before rolling out your fondant, make sure your work surface is clean and dry. Lightly dust the surface and rolling pin with powdered sugar or cornstarch to prevent sticking. If you’re concerned about the fondant drying out too quickly, you can also grease the surface with a very thin layer of shortening.
Step 2: Kneading the Fondant
Begin by kneading the fondant to make it soft and pliable. This can be done by using your hands to work the fondant back and forth, or by using a stand mixer with a dough hook attachment. Kneading helps remove any air bubbles and ensures a smooth texture.
Step 3: Rolling the Fondant
Once the fondant is kneaded, roll it out using a rolling pin. Start from the center and gradually roll towards the edges, turning the fondant occasionally to maintain an even thickness. Aim for a thickness of about 1/8 to 1/4 inch, depending on your preference and the design you have in mind.
Pro tip: Place a couple of dowel rods or thick books on either side of your fondant to use as guides for creating an even thickness.
Step 4: Transferring the Fondant
After rolling out the fondant, carefully lift it using a rolling pin or your hands, and drape it over your cake or other confection. Gently smooth the fondant over the surface, working from the center towards the edges to prevent wrinkles or air bubbles. Trim off any excess fondant using a sharp knife or pizza cutter.
Step 5: Troubleshooting Tips
If you encounter any issues with your fondant, don’t panic! Here are a few troubleshooting tips that might help:
- If the fondant is too sticky, dust your hands with powdered sugar or cornstarch before kneading.
- If the fondant is too dry or cracks easily, add a small amount of vegetable shortening and knead it until it becomes more pliable.
- If air bubbles form while smoothing the fondant over your cake, use a pin or needle to gently prick the bubble and press the air out.

Covering a Cake with Fondant
Paragraph 1: Preparing the Cake
Before you begin working with fondant, it’s essential to have a well-prepared cake. Start by smoothing out any bumps or uneven surfaces with a layer of buttercream icing. This will create a smooth base for the fondant to adhere to. Make sure the cake is chilled and firm, as this will make it easier to handle during the covering process. Additionally, lightly dust your work surface with powdered sugar to prevent the fondant from sticking.
Paragraph 2: Kneading and Rolling the Fondant
To prepare the fondant for covering the cake, knead it until it becomes soft and pliable. This will warm up the fondant, making it easier to roll out. Next, dust your rolling pin with powdered sugar and roll out the fondant to a thickness of about 1/8 inch. Aim for a size that is slightly larger than the dimensions of your cake. Remember to work quickly to prevent the fondant from drying out.
Paragraph 3: Covering the Cake
Once your fondant is rolled out and ready, carefully lift it using a rolling pin or your hands. Gently drape it over the cake, starting from the top and working your way down the sides. Use your hands to smooth the fondant over the cake, being careful not to stretch or tear it. Trim away any excess fondant using a sharp knife or pizza cutter, leaving a clean and neat edge.
Paragraph 4: Dealing with Imperfections
Don’t worry if you encounter any imperfections while covering the cake with fondant. You can easily fix small tears or wrinkles by smoothing them out with your fingertips. For larger imperfections, use a fondant smoother to gently press and smooth the fondant’s surface. Remember, a little patience and practice go a long way when working with fondant.
Paragraph 5: Adding Decorations and Finishing Touches
Once your cake is covered with fondant, it’s time to get creative with decorations! Use cookie cutters, molds, or fondant shaping tools to create various shapes and designs. You can also add color to the fondant by kneading in gel food coloring. If you want to achieve a glossy finish, brush the surface of the fondant with a thin layer of clear piping gel. Finally, display your beautifully covered and decorated cake with pride and enjoy the admiration it receives.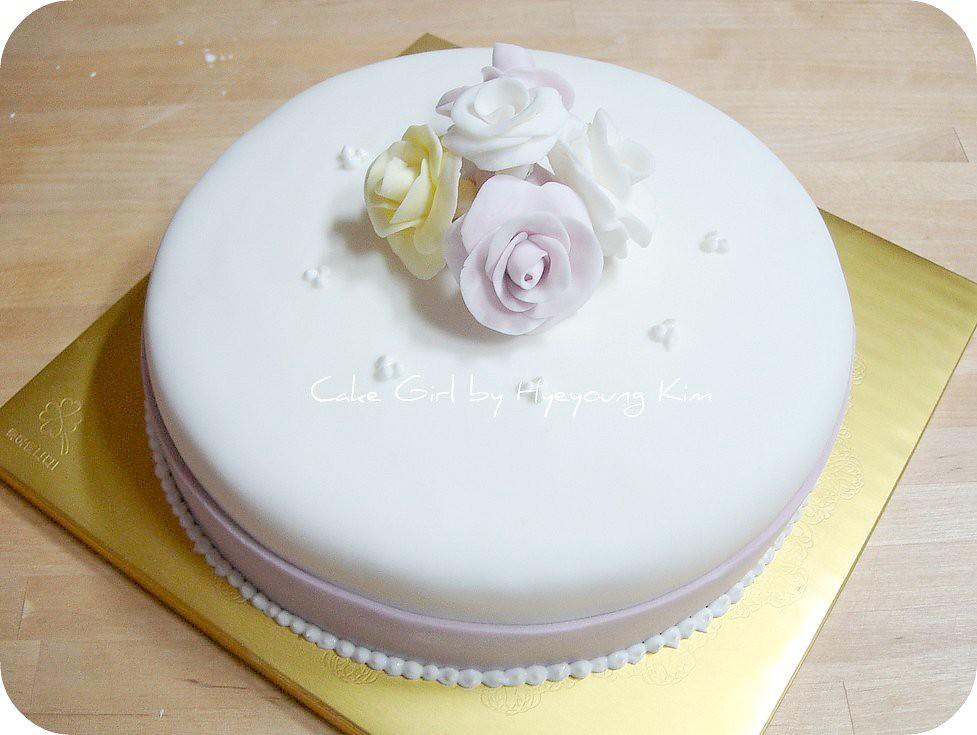
Creating Decorations with Fondant
<p>Are you looking to elevate your baking skills and create stunning decorations for your cakes and pastries? Fondant is a versatile and user-friendly medium that can help you achieve professional-looking results. In this guide, we will walk you through the steps of using fondant to create beautiful decorations that will leave your guests in awe.</p>
<h3>Gathering Your Supplies</h3>
<p>Before you begin working with fondant, it's essential to have all the necessary supplies at hand. Here's a list of items you'll need:</p>
<ul>
    <li>Fondant (store-bought or homemade)</li>
    <li>Rolling pin</li>
    <li>Cornstarch or powdered sugar for dusting</li>
    <li>Food coloring (gel-based works best)</li>
    <li>Piping bags and tips</li>
    <li>Various molds and cutters</li>
    <li>Edible glue or water for adhering fondant pieces</li>
</ul>
<h3>Preparing and Coloring Fondant</h3>
<p>Start by kneading your fondant to make it pliable. If it feels too stiff, you can warm it up by kneading it in your hands or using a microwave in short bursts, making sure not to overheat it. Once your fondant is soft and malleable, you can add coloring. Gel-based food coloring is recommended as it won't change the consistency of the fondant. Remember to add color gradually and knead well until you achieve the desired shade.</p>
<h3>Creating Basic Fondant Shapes</h3>
<p>Now that your fondant is ready, you can start creating basic shapes. Roll it out with a rolling pin on a clean, lightly dusted surface. Use cookie cutters or molds to cut out shapes like flowers, hearts, or stars. If you want to add texture, use embossing mats or texture sheets. To create three-dimensional objects like bows or figurines, shape the fondant with your hands and secure the pieces together using edible glue or water.</p>
<h3>Decorating Your Cakes and Pastries</h3>
<p>Once your fondant decorations are complete, it's time to decorate your cakes and pastries. Apply a thin layer of buttercream or jam to the surface where you want to place the fondant piece – this will act as an adhesive. Gently place your fondant decorations on top and press lightly to secure them. If you want to add more dimension, use a piping bag with royal icing to pipe details such as borders, polka dots, or names. Let your creativity run wild!</p>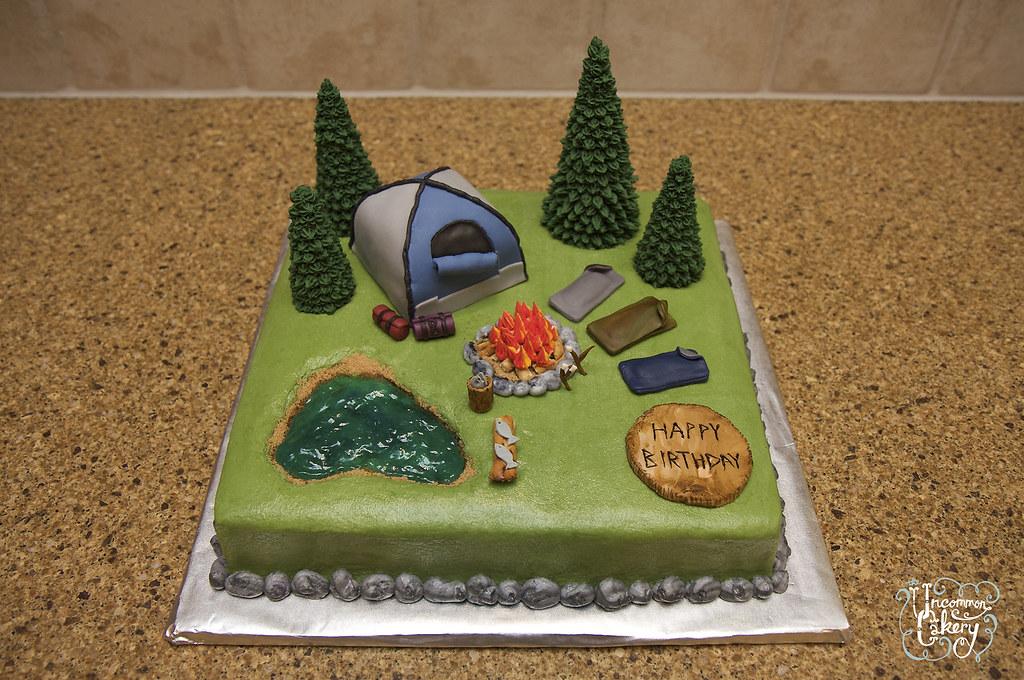
Tips and Tricks for Working with Fondant
Fondant can be a tricky medium to work with, but with the right techniques and a little practice, you can create stunning cakes and pastries that will wow your friends and family. Here are some tips and tricks to help you master the art of working with fondant.
1. Prep your workspace
Before you start working with fondant, make sure your workspace is clean and dry. Dust your surface with cornstarch or powdered sugar to prevent the fondant from sticking. Having a rolling pin, pizza cutter, and a sharp knife on hand will also make the process much easier.
2. Knead it right
One of the most important steps in working with fondant is kneading it to achieve the right consistency. Start by warming the fondant in your hands until it becomes soft and pliable. Then, sprinkle a small amount of cornstarch or powdered sugar on your workspace and knead the fondant until it is smooth, elastic, and free of any lumps or air bubbles.
3. Roll it out evenly
When rolling out your fondant, it’s crucial to ensure an even thickness. Begin by rolling from the center outwards, lifting and turning the fondant frequently to prevent sticking. Aim for a thickness of about 1/8 inch for covering cakes or creating decorations. Remember to measure the size of your cake beforehand so you can roll out enough fondant to cover it completely.
4. Fixing cracks and tears
If you encounter any cracks or tears while working with fondant, don’t panic! Instead, use a small amount of vegetable shortening or water to gently smooth and press the fondant back together. For larger tears, you can use a small piece of fondant as a patch to cover the damaged area. Smooth it over with your fingers or a fondant smoother for a seamless finish.
5. Storing and covering cakes
Once you’ve beautifully decorated your cake with fondant, it’s important to store it correctly to preserve its appearance. To prevent the fondant from drying out, store the cake in a cool, dry place, away from direct sunlight. You can also cover the cake with a clean, food-safe plastic bag or an airtight container. Always allow the fondant decorations to dry fully before storing or stacking your cakes to avoid smudging or dents.
| Quick Tips: |
|---|
| Always cover your fondant with plastic wrap when not in use to prevent it from drying out. |
| Use gel food coloring instead of liquid to avoid altering the consistency of the fondant. |
| Don’t be afraid to experiment and get creative with different shapes and designs. |
| Smooth edges and seams with a fondant smoother for a professional finish. |
| Practice makes perfect, so don’t get discouraged if your first attempts aren’t flawless. |
Q&A
Q: What is fondant and what is it used for?
A: Fondant is a pliable icing that is used to cover cakes or create decorative edible items. It is commonly used in cake decorating to achieve a smooth, flawless finish, and can also be molded into various shapes to create intricate designs.
Q: How do I prepare fondant before using it?
A: Before using fondant, it is important to knead it well. Start by dusting your hands with powdered sugar or vegetable shortening to prevent sticking. Then, firmly knead the fondant until it becomes soft, smooth, and pliable. This helps to remove any air bubbles trapped inside.
Q: How can I color fondant?
A: To color fondant, start by using a toothpick or a small amount of gel or powdered food coloring. Add the coloring gradually to the fondant and knead it until the color is evenly distributed. Remember to always start with a small amount of coloring as it is easier to add more later if needed.
Q: How do I roll out fondant?
A: Begin by dusting your work surface with powdered sugar or cornstarch to prevent sticking. Flatten the fondant using a rolling pin, working from the center outwards. Make sure to rotate and turn the fondant frequently to ensure an even thickness. Roll it to the desired thickness, usually around 1/8 to 1/4 inch, depending on your preference and the specific project.
Q: How do I cover a cake with fondant?
A: First, ensure that your cake is completely cooled and level on top. Roll out the fondant to the desired size, slightly larger than the cake itself. Carefully lift the fondant and drape it over the cake, starting from the center and gently smoothing it down the sides with your hands or a fondant smoother. Trim off any excess fondant.
Q: How can I fix any tears, cracks, or air bubbles in fondant?
A: To fix small tears or cracks in fondant, gently rub a small amount of shortening onto the affected area and smooth it out with your fingers. For larger cracks, try adding a small piece of fondant in a matching color and blend it in. To remove air bubbles, use a clean pin to gently prick the bubble, then smooth out the area with your fingers or a fondant smoother.
Q: Can I make fondant decorations in advance?
A: Absolutely! Fondant decorations can be made in advance and stored for later use. To keep them fresh, store them in an airtight container, away from direct sunlight or humidity. Remember to handle them with care when placing them on your cake to avoid breakage.
Q: How do I store leftover fondant?
A: Unused fondant should be tightly wrapped in plastic wrap or stored in a resealable plastic bag. Ensure that there are no air pockets to avoid drying out. Store it at room temperature in a cool, dry place. It is important to note that fondant can become firm after storage, so kneading it again will restore its pliability.
Q: Can I refrigerate or freeze cakes covered with fondant?
A: While refrigerating or freezing fondant-covered cakes is possible, it is not recommended as it can cause condensation when the cake is brought back to room temperature. This moisture can damage the appearance of the fondant, creating a sticky and shiny surface. In conclusion, mastering the art of working with fondant can open up a world of possibilities for creative and stunning cake designs. By following the step-by-step instructions outlined in this guide, you can confidently begin your journey into the world of fondant and bring your cake decorating skills to the next level. Remember to always start with a smooth and properly prepared cake surface, use the right tools, and take your time to ensure the best results. Whether you’re a beginner or a seasoned decorator, fondant can enhance your cakes and impress your guests. So, don’t be intimidated, give fondant a try, and let your imagination flow with endless artistic possibilities. Happy decorating!


